This post may contain affiliate links, which means I’ll receive a commission if you purchase through my links, at no extra cost to you. Please read full disclosure for more information.
This post is all about Easy Christmas Cookies.
You know that magical glossy sugar cookie icing that makes Christmas cookies look like they came straight from a bakery window? The kind that dries shiny, smooth, and beautiful — but still tastes delicious?
Well, you’re about to master it.
This Classic Sugar Cookie Icing is simple, foolproof, and requires no fancy ingredients or meringue powder. It’s glossy, pipeable, and perfect for decorating all your Christmas favorites — from gingerbread men to snowflakes, candy canes, and stars.
Whether you’re baking for family fun, a cookie swap, or your Pinterest followers, this is the icing recipe that makes your cookies sparkle like they belong on a magazine cover.

🎄 Why You’ll Love This Classic Icing Recipe
This icing is your new best friend for holiday baking — it’s easy enough for beginners, but the results look professional.
Here’s why this recipe is worth pinning (and re-pinning):
- No-fail consistency: Smooth, glossy finish every time — no cracking, no dullness.
- No meringue powder: Just pantry staples — powdered sugar, milk, corn syrup, and vanilla.
- Fast drying: Sets beautifully in about 2–3 hours (fully hard overnight).
- Customizable colors & flavors: Easily tint with food coloring or add flavor extracts.
- Tastes amazing: Sweet, buttery, and soft to bite — no chalky royal icing texture here.
🍬 Ingredients You’ll Need
This simple glaze comes together with just four main ingredients:
- 2 cups powdered sugar (confectioners’ sugar) — sifted for smoothness
- 2–3 tablespoons milk — whole milk or cream gives the best texture
- 1 tablespoon light corn syrup — adds gloss and helps icing set perfectly
- ½ teaspoon vanilla extract (or almond, lemon, or peppermint extract for variety)
Optional:
- Gel food coloring for vibrant hues
- Sprinkles or edible glitter for holiday flair
🥣 How to Make Classic Sugar Cookie Icing (Step by Step)
Step 1: Sift the Sugar
In a large mixing bowl, sift your powdered sugar to remove any lumps. Smooth sugar means a glass-like icing finish.
Step 2: Add Milk & Stir
Start with 2 tablespoons of milk and whisk until smooth. Add more milk a teaspoon at a time until the icing reaches your desired consistency.
For outlining: You want a thick, toothpaste-like texture that holds its shape.
For flooding (filling): Aim for honey-like consistency that slowly drips from a spoon.
Step 3: Add Corn Syrup & Flavoring
Stir in light corn syrup and vanilla extract.
This is the secret step — corn syrup gives the icing its glossy sheen and slightly elastic texture, so it flows beautifully when piped and dries to a smooth, shiny finish.
Step 4: Divide & Tint
If you’re adding colors, divide icing into small bowls. Add a few drops of gel food coloring (avoid liquid — it thins the icing too much).
Popular Christmas shades:
- Red (classic candy cane)
- Green (holly or tree designs)
- White (snowflakes & outlines)
- Gold or silver shimmer (for elegant cookies)
Step 5: Decorate Away!
Spoon your icing into piping bags or squeeze bottles for precision.
- Outline first: Use thicker icing to create a border.
- Flood next: Fill with thinner icing and use a toothpick to spread evenly.
- Add details: Once the base sets slightly, pipe contrasting lines, dots, or snowflake designs on top.
Pro Tip: For marbled cookies, drop dots of a second color on wet icing and swirl with a toothpick.
Step 6: Let It Dry
Let cookies dry uncovered at room temperature for at least 2–3 hours (overnight for stacking or packaging).
The result? Glossy, picture-perfect sugar cookies that stay shiny for days — even after storing or shipping.
✨ Expert Tips for Perfect Glossy Icing
- Always sift powdered sugar. It prevents clumps and ensures a mirror-smooth finish.
- Don’t skip the corn syrup. It’s the key to that “bakery window” shine.
- Test consistency first. Drag a knife through your icing — if it smooths out in 10 seconds, it’s perfect for flooding.
- Use gel color, not liquid. Liquid dyes can dull the shine and over-thin the icing.
- Let layers dry before adding details. This keeps colors crisp and prevents bleeding.
- Avoid humidity. High moisture in the air can prevent icing from fully setting.
🍭 Flavor Variations
Give your icing a signature twist with these easy swaps:
- Peppermint Icing: Replace vanilla with peppermint extract for candy cane vibes.
- Almond Icing: Add almond extract — pairs beautifully with buttery sugar cookies.
- Lemon Icing: Add lemon extract and zest for a fresh citrus kick.
- Cinnamon Vanilla Icing: Mix in ½ teaspoon cinnamon for cozy warmth.
- Coconut Icing: Add coconut extract and top with shredded coconut “snow.”
You can even make a gingerbread glaze by adding a pinch of ground ginger and cinnamon — perfect for your Gingerbread Christmas Cookies recipe!
🎨 Decorating Ideas for Perfect Cookies
These icing designs are perfect for holiday visuals:
1. Minimalist Snowflake Cookies
White icing on beige sugar cookies with delicate piped snowflake lines and silver pearl sprinkles.
2. Red & White Candy Cane Swirls
Marble red and white icing together for classic peppermint-stripe cookies.
3. Gilded Ornaments
Flood cookies with pale gold icing, then add white royal icing details and edible glitter for a luxury holiday look.
4. Rustic Farmhouse Trees
Outline tree-shaped cookies with white icing, fill with sage-green, and top with tiny white dots for a snowy effect.
5. Whimsical Christmas Characters
Use different colors and candy eyes to create snowmen, reindeer, and Santas — kid-friendly and Instagram-ready.
🧁 Storage & Make-Ahead Tips
- Room Temperature: Once fully dry, store decorated cookies in an airtight container for up to 7 days.
- Layer with Parchment: Prevents smudging and color transfer.
- Freezing: You can freeze undecorated cookies, then thaw and ice later.
- Make Ahead: Icing can be stored in airtight containers (with plastic wrap touching the surface) for up to 1 week. Just whisk before using.
Pro Tip: Never refrigerate iced cookies — condensation dulls the shine.
🎅 Pairing This Icing with Your Christmas Cookie Series
This icing is the perfect finishing touch for your entire holiday baking lineup:
- 🎄 Easy Sugar Cookies with Only 3 Ingredients — drizzle or flood for elegant simplicity.
- 🍪 Soft & Buttery Classic Christmas Cookies — pipe with white icing and sprinkles.
- ✨ Classic Chewy Snickerdoodles — a thin vanilla glaze adds glossy shine.
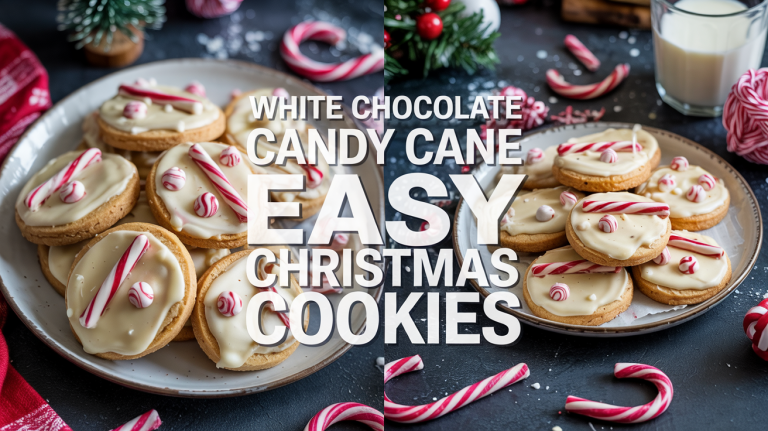
- ❤️ White Chocolate Candy Cane Cookies — swirl red icing for peppermint-candy style.
- ☕ Gingerbread Christmas Cookies — outline and fill with crisp white snowflake icing.
💬 FAQ
Q: Does this icing harden completely?
A: Yes! It sets glossy and firm to the touch but stays soft when you bite in — no breaking teeth here.
Q: Can I use water instead of milk?
A: You can, but milk adds richness and a creamier flavor.
Q: How long does it take to dry?
A: About 2–3 hours for surface dry, 8 hours to fully harden for stacking or packaging.
Q: Can I flavor it differently?
A: Absolutely! Try peppermint for Christmas or almond for classic bakery flavor.
Q: What’s the best way to color it?
A: Use gel or powder food color for rich tones that don’t affect consistency.
💖 Final Thoughts
This Classic Sugar Cookie Icing proves that simple can be spectacular. It’s smooth, shiny, and sweet — the kind of icing that makes your cookies look too pretty to eat (but too delicious to resist).
It’s more than a recipe — it’s the finishing touch that turns good cookies into Pinterest-worthy showstoppers.
So mix, color, swirl, and drizzle your way into Christmas joy — because every cookie deserves its moment to shine ✨